Help: Contents
If you need more help, feel free to private message noungning our wiki mod or darvil one of our admin.
Contents
Create A Non-existing Page
First Method (Red Links)
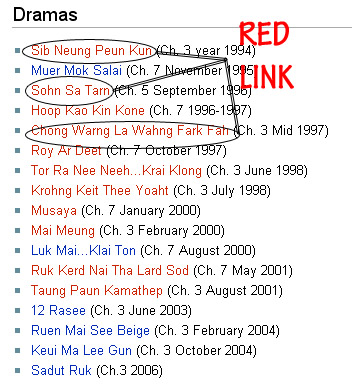
When you see an object with red font this means the page doesn't exist in our wiki, and it needs to be made. If the font is blue or purple, it means it has a page and is "linked" or is connected to another page.
Click on a red link
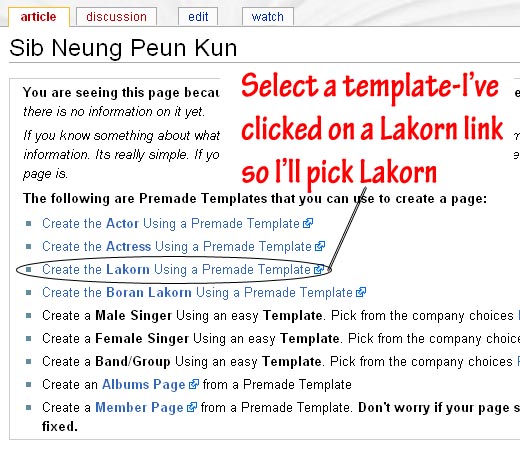
Once you click onto a red link, the page you will see is this:
Click on the type of template you would like to use, in my example, I clicked a Lakorn, so I will use the "Lakorn Template"
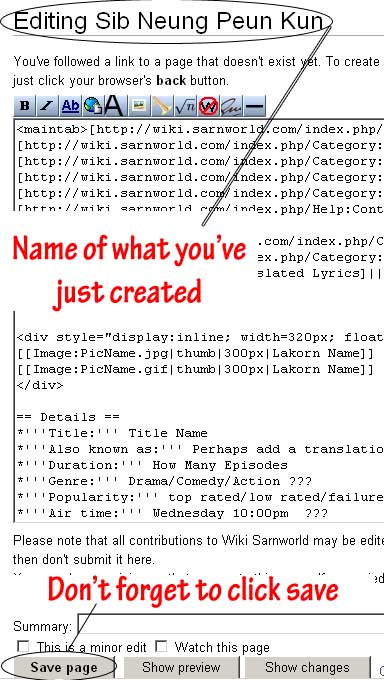
Then you will be in the template, with the name of the Lakorn which you've clicked.
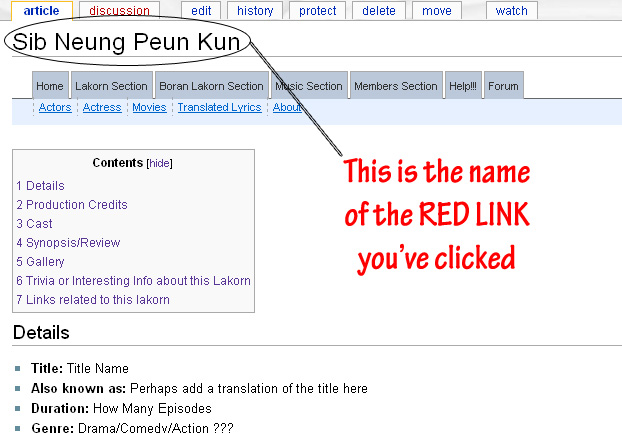
Once you click save, you will be shown with the page you've just created. Now you can click edit and edit the info, and don't forget to click save!
Noungning 09:20, 7 April 2008 (PDT)
Second Method (Creating From the Box Template)
With these, you can make anything, however you have to go into the area where you'd like to make the page, and create the person. Very easy, however, if there are duplications i.e. you make something that already exists with the same name, spelled the same exact way, it will just bring you to that page. But due to various spellings of the item you want to make, you might end up making a duplication of something that already exist but is spelled differently. Please check for the item you want to create before you create them.
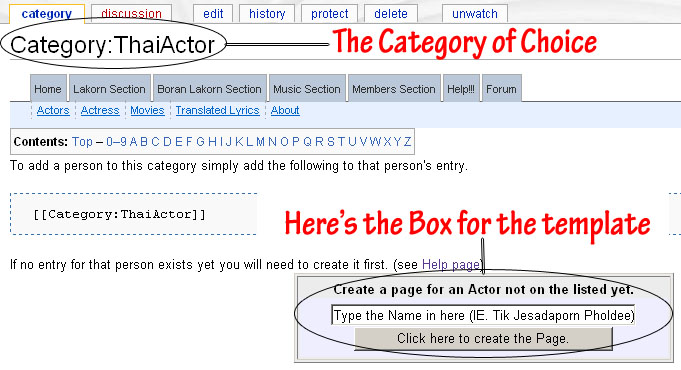
First, click on the category where you want to create this item. I'll create a Male Actor in this example.
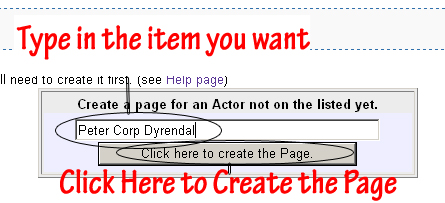
In the box, type in the Actor you'd like to add, after you've searched and have not found this person in the list. Please use this format for the name Nickname Realname Lastname, I'll do a page for Peter Corp Dyrendal since that doesn't exist.
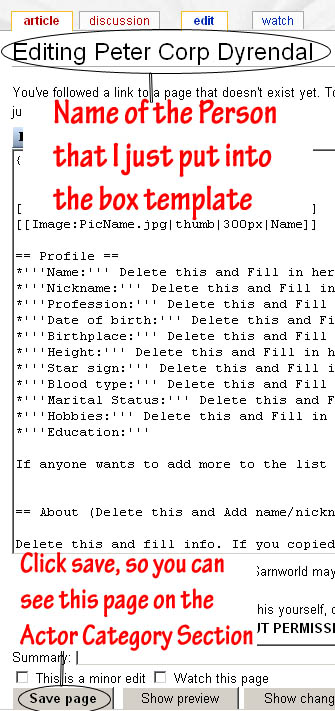
After you click click here to create the page this is what you will see:
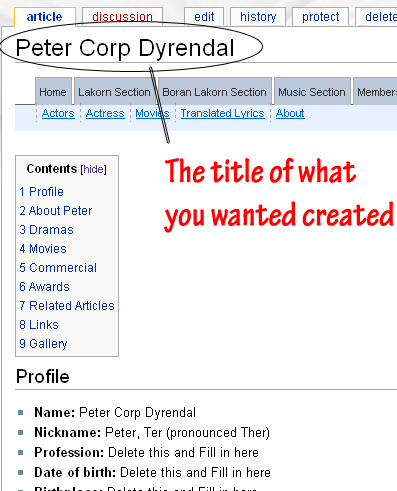
Once you click save, you will be directed to this page, which means the page is made:
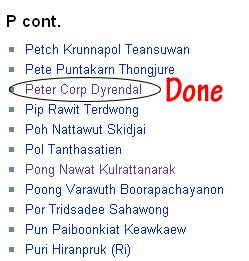
Now, you can click on the Actors tab, and look to see the name in the list:
Noungning 11:44, 7 April 2008 (PDT)
Editing the Articles (Profiles)
Editing all contents on the page
This is very easy to do. First off, selet the page you want to edit. In this case, I'm working on the actress section so I've selected Ploy Chermarn Booyasak.
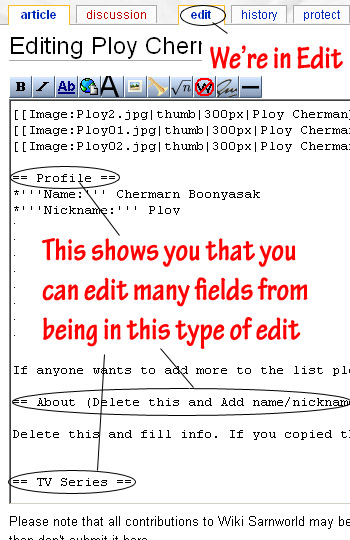
On top of the page, you will see the following:
Click on Edit to edit the entire profile.
When you are in the edit area, you will see that you can edit the whole entire page from this edit.
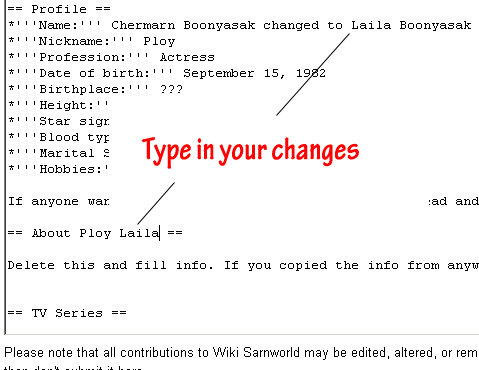
Edit the page with the information you'd like to input.
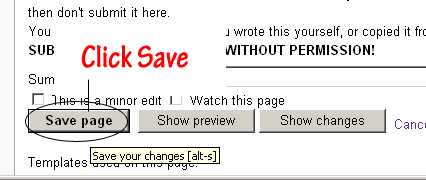
Then when you're done, don't forget to click save.
Finish product.
Noungning 08:56, 23 April 2008 (PDT)
Editing Specific Sections
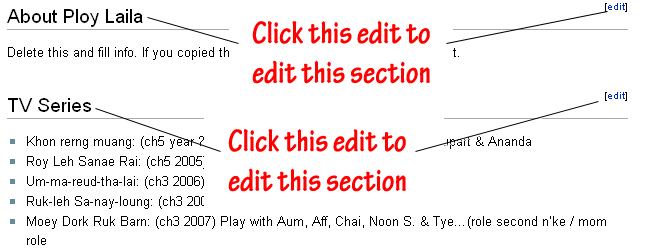
This is easier for those who just wants to edit a particular section, so you don't have to scroll through so much information to get to a specific section, you can just go to that section you want to edit and click on the edit to the top right hand side of the section.
So if you would like to edit profile section, click on the edit to the immediate right of that heading to edit the information below the section.
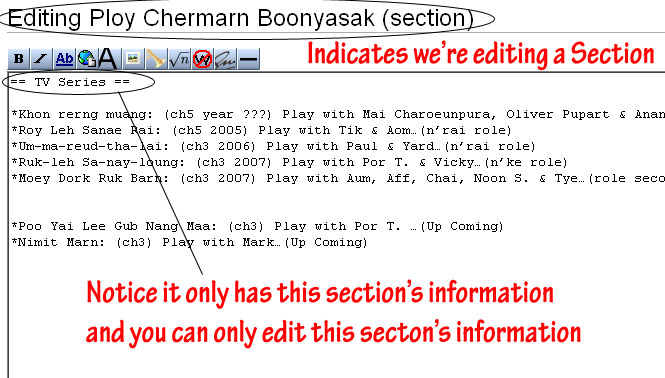
In this example I clicked on the edit for TV Series, so we will be going into edit her lakorn information.
Now, just change whatever information you'd like and click save.
Finish result.
Noungning 08:55, 23 April 2008 (PDT)
Linking Pages
Notice from various pages you've looked at, there are pages that link to another wiki page. And if there isn't a page that it can link to, it's red, and if it's able to link to another page, it's either blue or purple.
To link a to another page use the [[ ]]:
[[Page you want to link goes in here]]
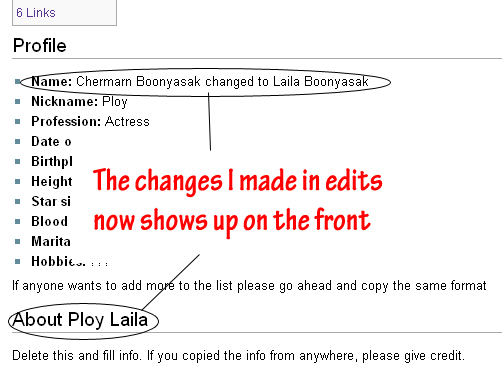
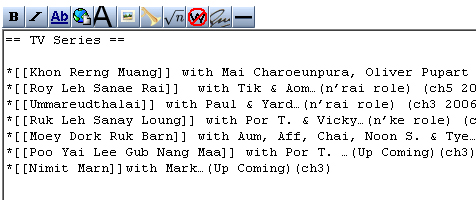
Notice in the edits, what I've done, I placed [[ ]] at the beginning and ending of the Lakorns. This will link it to any page that has the same exact name as what is between the [[ ]].
After you click save. You will see:
For the best results, search for what you want to link the page to, then copy and paste the title of the page of the profile in between the brackets so you know for sure that the page exists and is spelled correctly. Many pages are created and can be spelled differently, so you should always search first for the page so it will link to a page that may exist with a different spelling.
I am currently trying to go through all the pages and link them, but this is a very long and tideous task, I will not be able to catch up on all but don't worry, I will try my best to go through and link them.
Noungning 11:23, 23 April 2008 (PDT)
Creating A Gallery
Tutorial Coming Soon.
Uploading And Inserting Images
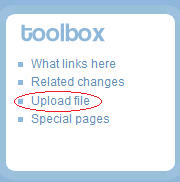
 Click on the upload file link under the toolbox. This is located on the left hand side.
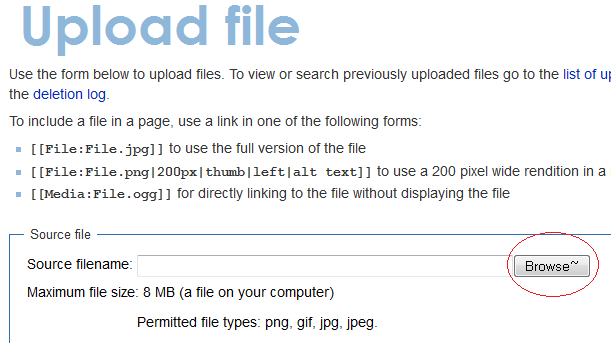
 The Upload Link page will show, click on browse.
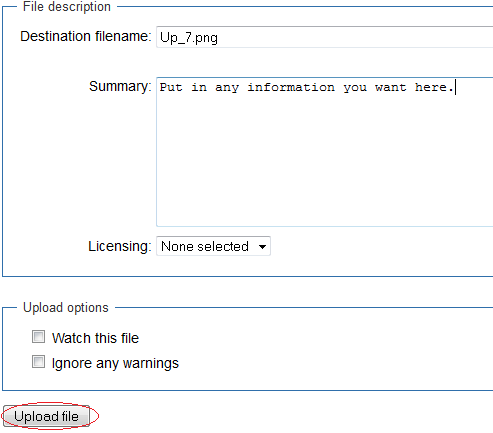
Browse to the file you would like, open it. DO NOT change destination filename unless there's a duplicate name, only change the beginning of the name and not the extension of the name (the period) or else it will error. Update the summary as you'd like, then click on Upload File.
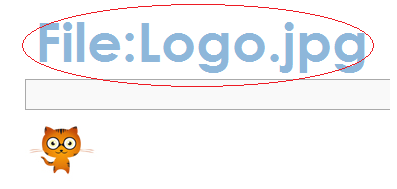
 Remember the name you used as seen in this photo here.
Now find the page where you want to put in the picture. Here, I picked a random page. But let's say I decided this is the page where I want to add more pictures.
Click edit in the right section and find codes that look something like this:
[[Image:Logo.jpg|thumb|300px|Asian Fuse's Logo]]
Read this to mean: Image:NameofImage.jpg, show as thumbnail, pixel size, name of image you want people to read under the image. Just make a copy of one of the current photos, add to the bottom, add to the top, and edit the part that is after image: or file: or media:.
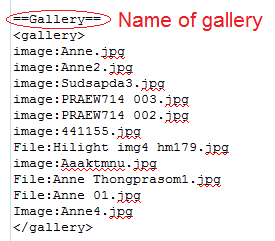
To add images to a gallery is more simpler! Remember that name of the picture! Go to the gallery section of the page, click edit and add the photo name. Just make sure that they are between the <gallery> </gallery> codes.
Noungning 02:28, 5 January 2013 (UTC)
Giving Credit to Yourself Using a Timestamp
To put your name on the edits, use these ~ and it will put your name and timestamp:
~~~~
Make sure you use 4 of them, you don't need to type your name after those characters. Wiki will detect who you are and put your name and the current time and date. The time will be the server time and not your actual time. Hope this helps and now you can put your name after your edits. It's not necessary since we can see who edited pages on page history, but this will be a nice thing to have if you've written a biography of someone, wrote a small article, or gave a lakorn a brief synopsis.
Noungning 04:53, 24 November 2012 (UTC)
