Help: Contents
| Line 139: | Line 139: | ||
[[Image:Endresult.jpg|frame|left|none]] | [[Image:Endresult.jpg|frame|left|none]] | ||
| + | [[User:Noungning|Noungning]] 08:55, 23 April 2008 (PDT) | ||
| + | == Linking pages == | ||
| + | |||
| + | Tutorial Coming Soon. | ||
== Creating A Gallery == | == Creating A Gallery == | ||
| Line 146: | Line 150: | ||
== Uploading And Inserting Images == | == Uploading And Inserting Images == | ||
| + | |||
| + | Tutorial Coming Soon. | ||
| + | |||
| + | == Giving Credit to Yourself Using a Timestamp == | ||
Tutorial Coming Soon. | Tutorial Coming Soon. | ||
Revision as of 10:55, 23 April 2008
To discuss about this Thread about the Wiki at sarNworld.
Need help? Here's a picture tutorial Thanks to KhoOnxNouxWanxJai or Tina.
If you need more help, feel free to private message noungning our wiki mod or darvil one of our admin.
Contents
Create A Non-existing Page
First Method (Red Links)
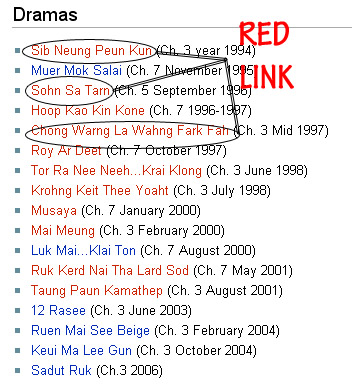
When you see an object with red font. This means, the page doesn't exist in our wiki, and it needs to be made. If the font is blue or purple, it means it has a page and is "linked" or is connected to another page.
Click on a red link
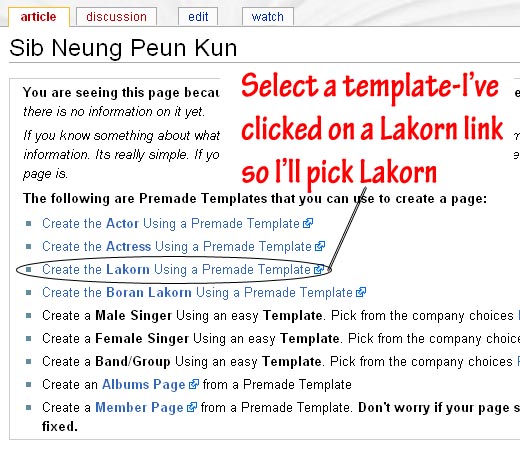
Once you click onto a red link, the page you will see is this:
Click on the type of template you would like to use, in my example, I clicked a Lakorn, so I will use the "Lakorn Template"
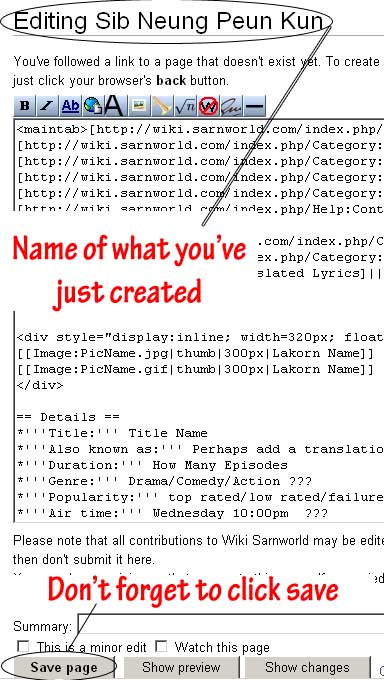
Then you will be in the template, with the name of the Lakorn which you've clicked.
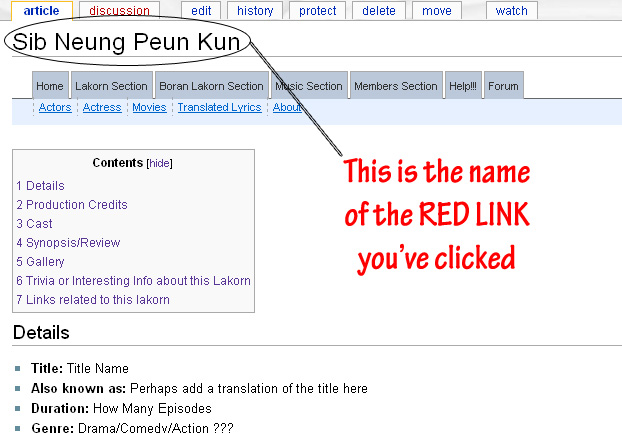
Once you click save, you will be shown with the page you've just created. Now you can click edit and edit the info, and don't forget to click save!
Noungning 09:20, 7 April 2008 (PDT)
Second Method (Creating From the Box Template)
With these, you can make anything, however you have to go into the area where you'd like to make the page, and create the person. Very easy, however, if there are duplications i.e. you make something that already exists with the same name, spelled the same exact way, it will just bring you to that page. But due to various spellings of the item you want to make, you might end up making a duplication of something that already exist but is spelled differently. Please check for the item you want to create before you create them.
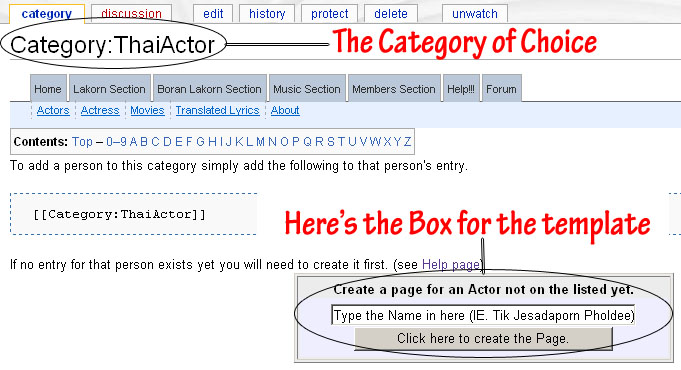
First, click on the category where you want to create this item. I'll create a Male Actor in this example.
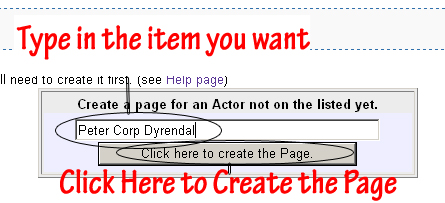
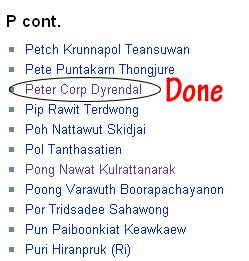
In the box, type in the Actor you'd like to add, after you've searched and have not found this person in the list. Please use this format for the name Nickname Realname Lastname, I'll do a page for Peter Corp Dyrendal since that doesn't exist.
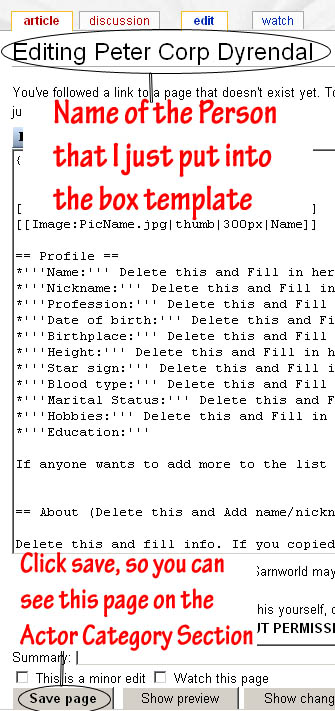
After you click click here to create the page this is what you will see:
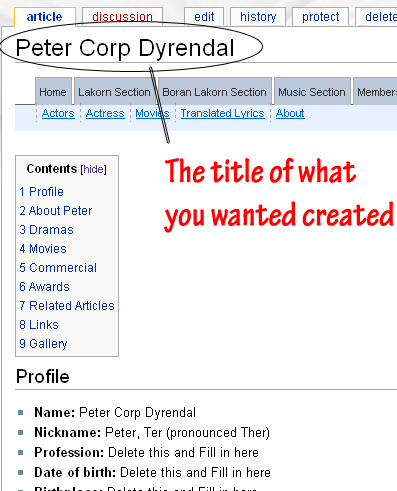
Once you click save, you will be directed to this page, which means the page is made:
Now, you can click on the Actors tab, and look to see the name in the list:
Noungning 11:44, 7 April 2008 (PDT)
Editing the Articles (Profiles)
Editing all contents on the page
This is very easy to do. First off, selet the page you want to edit. In this case, I'm working on the actress section so I've selected Ploy Chermarn Booyasak.
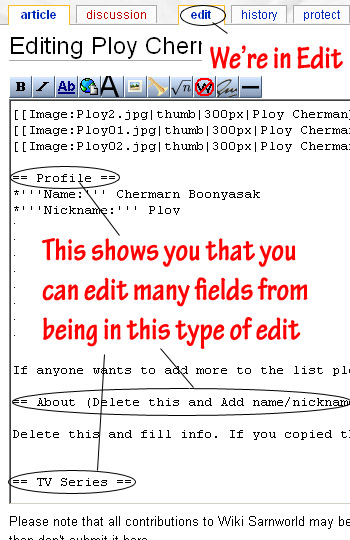
On top of the page, you will see the following:
Click on Edit to edit the entire profile.
When you are in the edit area, you will see that you can edit the whole entire page from this edit.
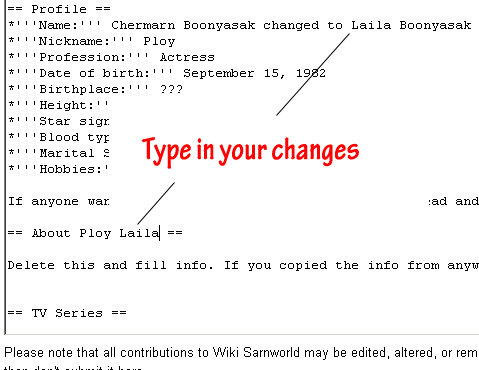
Edit the page with the information you'd like to input.
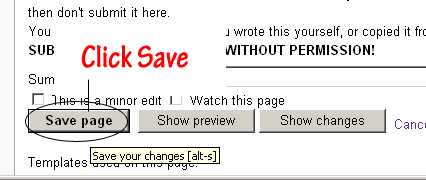
Then when you're done, don't forget to click save.
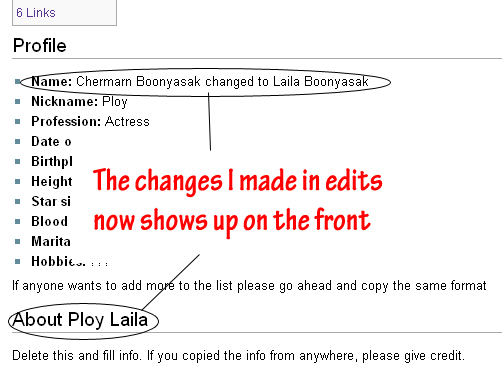
Finish product.
Editing Specific Sections
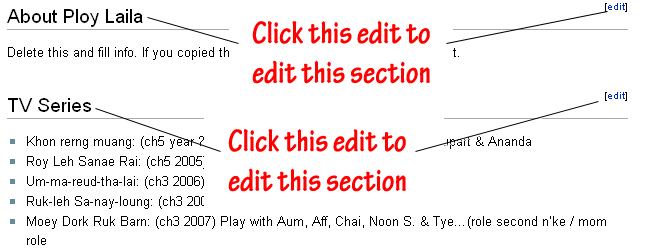
This is easier for those who just wants to edit a particular section, so you don't have to scroll through so much information to get to a specific section, you can just go to that section you want to edit and click on the edit to the top right hand side of the section.
So if you would like to edit profile section, click on the edit to the immediate right of that heading to edit the information below the section.
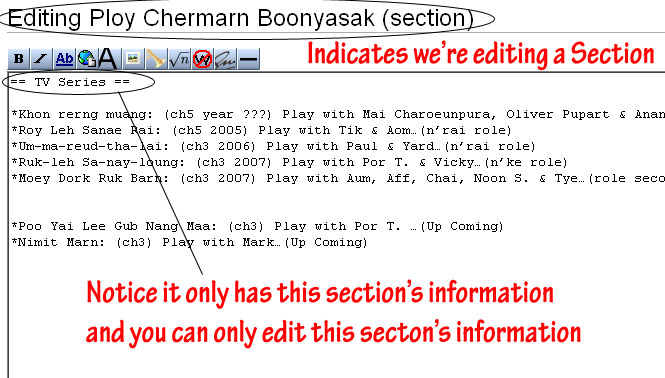
In this example I clicked on the edit for TV Series, so we will be going into edit her lakorn information.
Now, just change whatever information you'd like and click save.
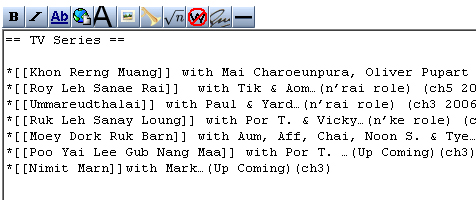
Finish result.
Noungning 08:55, 23 April 2008 (PDT)
Linking pages
Tutorial Coming Soon.
Creating A Gallery
Tutorial Coming Soon.
Uploading And Inserting Images
Tutorial Coming Soon.
Giving Credit to Yourself Using a Timestamp
Tutorial Coming Soon.
